Musculoskeletal System

Backpack Safety

Backpack safety

By: Dr. Alyssa Musgrove


It’s that time again – students are heading back to school. This year, school looks different for many students choosing to learn online at home. But for those who are heading back to campus, it’s likely they’ll be carrying backpacks. It’s important to understand the effects heavy backpacks can have on a child’s growing body.


Hauling a backpack loaded with books, school supplies, binders, lunch and water bottles can add up to a significant amount of weight. (One textbook or binder can weigh up to 3.5 pounds!) Carrying around this amount of weight on a daily basis could be setting students up for future neck, shoulder, hip, back, muscle and joint injuries.  In fact, roughly 14,000 children are treated for backpack-related issues annually.


Overstuffed, heavy backpacks create a forward trunk lean that rounds the upper back, causing forward head posture. This awkward posture results in neck and shoulder pain. It also makes it difficult for the muscles and ligaments to hold the body up correctly. Shoulders are not made to hang things on, so a heavy load placed on the shoulders alters the biomechanics and creates potential strain and tightening of the muscles. Hips can become sore if a child is bending forward to compensate for the backward pull of a heavy backpack. Knee pain is possible because of the change in walking pattern and body posture due to an overweight pack.


The good news is injury is preventable, and there are ways for kids to carry backpacks comfortably. The following four guidelines were established by Backpack Safety International™:


  1. Choose it Right

The size of the backpack should be proportional to the size of the person wearing it. The height of the backpack should be no more than three quarters of the length of the torso. The bottom of the pack should sit two inches from the waist. A backpack that is too large invites you to fill it to capacity, which will go beyond healthy and safe limits.


Don’t assume that paying more for the pack will guarantee your child’s safety. Look for backpacks that have padded shoulder straps to prevent pinching the nerves around the neck and shoulder area. Some packs have lumbar (low back) padding to buffer the lower part of the back from the hard edge of books and other contents. Also, opt for a waist strap when possible. The strap can be used to stabilize the pack load and prevent injuries that occur if the load is swung.


  1. Pack it Right

Backpack Safety International and The American Academy of Orthopedic Surgeons recommend that no more than 15 percent of the child’s body weight be carried in the backpack. For example, a child weighing 85 pounds should carry no more than 12 pounds in his backpack. If the child must lean forward to handle the load of the pack, then it is too heavy. Books can be very heavy; so only carry items that are necessary for that day’s activities. When packing the bag, use all available compartments and pockets to help distribute the weight. Pack heavier things low and towards the back, closer to the body. Check the backpack weekly to ensure the weight remains manageable.


  1. Lift it Right

Improper lifting can do damage to the spine — especially a child’s growing spine! Say your child lifts a backpack 10 times a day and it weighs (conservatively) 12 pounds. With about 180 days of school per year, that is 21,600 pounds the child lifts each school year. That is roughly 11 tons — the equivalent of 6 mid-size automobiles – that your child lifts every year! Teach your child how to safely pick up a heavy backpack by bending at the knees and lifting with the legs to protect the back and shoulders.


  1. Carry it Right

Children have creative ways of wearing their backpacks. Putting the load on the front is no safer than the back. Most commonly, you see backpacks dangling by one shoulder strap or hanging so low that the pack rests on their bottom, which pulls the shoulder blades and spine far from the healthy, upright posture. The best way to wear a pack is using both shoulder straps, with the pack positioned in the middle of the back.


Rolling backpacks may be a viable alternative, but they have disadvantages, as well. Wheels and handles can add as much as 20 percent to the overall weight of the backpack – and that’s before you add books and other items. That makes rolling backpacks often just as heavy as traditional backpacks. Rolling backpacks can also be difficult to lift properly when carried up and down stairways, or getting in and out of a vehicle. They also can present a tripping hazard in crowded hallways and school corridors.


If you have been concerned about the effects of extra weight on your child’s still-growing body and spine, your instincts are correct. Heavy backpacks can lead to numerous problems from back and shoulder pain to poor posture.  By carefully choosing the right pack for your child, packing it correctly, and teaching your child proper lifting and carrying techniques, you can help prevent future injury and pain.


Pathways to Healing specializes in holistic chiropractic care. Dr. Alyssa Musgrove draws on a variety of techniques, including chiropractic, kinesiology, nutrition, food allergy testing and lifestyle counseling to assist clients in achieving optimal health and wellness in one setting. In addition, the practice is committed to being a valuable source of information so that people can learn how to live a healthy lifestyle and prevent future illness. Pathways to Healing is located at 1022 Founders Row, Lake Oconee Village, Greensboro. The office can be reached at 706-454-2040.

Back Pain

Got back pain? Pay attention to this muscle

By: Dr. Alyssa Musgrove


If you, or someone you know, is always searching for back pain relief, it may be time to examine the psoas muscle. I work on the psoas (pronounced SO-as) muscle every day with my patients. Many people have not heard of this muscle, yet it is a major player when it comes to back pain, especially when there is difficulty straightening up from a seated position.


The psoas is a rope-like muscle that attaches to all the low back bones (lumbar vertebra), runs down across the groin and attaches to the inside of the hip. The psoas is joined at the hip, literally, by the iliacus, which travels from hip to thigh. Together, the psoas and iliacus make up the iliopsoas – the body’s most powerful hip flexor. The psoas helps promote good posture and stabilizes your abdomen and pelvis as it works together with your abs, obliques and lower back muscles. Every time you stand, walk, or run, or play golf, you’re engaging the psoas.


When the psoas is weak or tight, it can cause symptoms such as pain across the lower back, groin pain, hip pain, pain in the buttocks, difficulty walking up stairs or hills, tight hamstrings, knee pain and even foot pain.


John Stiner, a massage therapist based in Durham, N.C., whose credentials include a 2008 stint with the Nike Oregon Project, has noticed an epidemic of psoas tightness among his running clients. The number one culprit, he says, is your chair. Sitting for long periods puts the psoas in a perpetually shortened state. The muscle has memory and will maintain this shortened state, even when you get up from your chair. “Our bodies simply aren’t designed to sit all day,” says Stiner.


Another cause of imbalanced psoas muscles are abdominal crunches. Performing too many sit-ups causes the psoas muscle to shorten, which can lead to an increased arch in the lower back and a head-forward posture. While this posture is normally seen in the elderly population, nowadays, we are seeing this type of posture in younger people.  Rather than just focusing on abdominal exercises, it is better to have a more balanced program that works the core muscles in the back, as well as the front of the body. Sleeping in the fetal position also causes prolonged periods of stress on your psoas muscle.


You can perform a simple test to determine if you have a tight psoas. Lie on your back with both legs straight. Pull one knee towards your chest. If the other leg lifts off the floor, then your psoas is too tight. Now try the other side.


Regular gentle stretching is the best antidote for a tight psoas. Keep in mind that it will take time to release the psoas. The muscle has to be retrained, and you have to be consistent with the stretching. Be careful not to overstretch, which can cause the muscle to contract and shorten. Start your stretch slowly and ease into it without straining. You want to feel a lengthening sensation of the muscle.


Here are two simple psoas stretches you can try at home:


KNEELING LUNGE

Kneel on one knee, with the front leg forward at a 90-degree angle. With your pelvis tucked, lunge forward, easing into the stretch without straining. If your psoas is tight, your natural tendency may be to arch your lower back; make it a point to keep the back straight. Raise your arms overhead for an added abdomen stretch. To dynamically stretch the psoas, complete 20 reps on each side, holding the lunge for 2 to 3 seconds.


WARRIOR YOGA POSE

Step one foot 3 to 4 feet in front of you. Lunge forward until your front knee is at a right angle. (Readjust your foot position if necessary.) Turn your back foot out about 45 degrees. Keeping your back foot firmly planted, and your head, shoulders, hips and knees facing forward, raise your arms overhead. Relax your shoulders; don’t let them inch up. Lift your rib cage away from your pelvis to really stretch the psoas. As in all yoga poses, breathe deeply and easily. Don’t strain. Hold for 30 to 60 seconds.


Other tips to keep your psoas in top shape include:


1.    Sitting less — Try to get up every 45 minutes, at least. If you are traveling long distances, stop every 3 hours and stretch or walk for 5-10 minutes.

2.    Reach for support — Add support to your car seat by using a rolled up towel or small pillow behind your lower lumbar spine.

3.    Professional massage — Massage can help relieve a tight psoas, although this type of massage is not always comfortable.


By consistently working to relax the psoas and gradually restore its length, you will help reduce lower back pain, hip pain, groin pain, buttock pain and tight hamstrings, as well as prevent future injury.


Pathways to Healing specializes in holistic chiropractic care. Dr. Alyssa Musgrove draws on a variety of techniques, including chiropractic, kinesiology, nutrition, food allergy testing and lifestyle counseling to assist clients in achieving optimal health and wellness in one setting. Pathways to Healing is located at 1022 Founders Row, Lake Oconee Village, Greensboro. The office can be reached at 706-454-2040.
Tips For Golfers

By: Alyssa Musgrove – Pathways To Healing

Photo credit: Visit Lake Oconee

Golf is a challenging and often frustrating sport. Many golfers feel the mental component of the game is their greatest challenge, and undervalue the biomechanics and conditioning required to play the game well and play the game longer. This is a mistake that can lead to poor play and injury.

An extreme amount of compressive force – up to 10 times a person’s body weight – is exerted on the spine during the golf swing. Every joint involved in the swing is taken through its maximum range of motion. Many golfers contort their bodies into oddly twisted postures, generating a great deal of torque. Couple this motion with a bent-over stance, repeat 120 times over three or four hours, add the fatigue that comes with several miles of walking or hot summer weather, and you’ve got a recipe for lower back trouble.

“Most golfers go until they get hurt, then look for help,” says Dr. David Stude, member of the American Chiropractic Association (ACA) Sports Council and founding fellow of the National Golf Fitness Society. “Back pain is a warning sign there is an underlying problem responsible for a symptom that will likely get worse. Doctors of chiropractic look for the cause of the symptom and help reduce the likelihood of future injury.”

There’s a reason Tiger Woods, Phil Mickelson, Jack Nicklaus and Arnold Palmer have all relied on chiropractic care throughout their careers. Tiger Woods has said, “…lifting weights and seeing a chiropractor on a regular basis has made me a better golfer. I’ve been going to chiropractors for as long as I can remember. It is as important to my training as practicing my swing is.”

Aside from regular chiropractic adjustments, Dr. Stude and the ACA suggest these simple measures to help you avoid back pain or injury, and improve your overall game:

  • Purchase equipment that fits. Don’t adapt your swing to the wrong clubs. Someone six feet tall playing with irons designed for someone five inches shorter is begging for back trouble.
  • For women: If you have “inherited” your significant other’s golf clubs, beware. Not only are the clubs likely too long, the shaft is often not flexible enough for a woman’s grip. Women play better with clubs composed of lighter, more flexible material, such as graphite.
  • For men: While men are traditionally stronger than women, they usually aren’t as flexible. Men should spend extra time stretching before and after play to increase trunk flexibility. Improved flexibility helps men maintain a more even and consistent swing plane, which leads to more consistent performance.
  • For senior golfers: If you show signs of arthritis in the hands, consider a larger, more specialized grip for added safety and performance.
  • Take lessons. Learning proper swing technique is critical. At the end of the swing, you want to be standing up straight; the back should not be twisted.
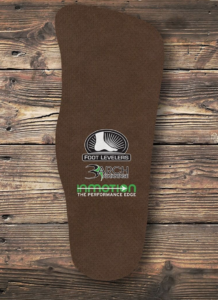
  • Wear orthotics. These shoe inserts support the arch, absorb shock, and increase coordination. Studies show custom-made, flexible orthotics can improve the entire body’s balance, stability and coordination. This translates into a smoother swing and reduced fatigue.
  • Photo Credit: Foot Levelers

    Warm up before each round. Stretching before and after 18 holes is the best way to reduce post-game stiffness and soreness. Take a brisk walk to get blood flowing to the muscles; then do a set of stretches. To set up a quality stretching and/or exercise routine, see a chiropractor or golf pro who can evaluate your areas of tension and flexibility.

  • Pull, don’t carry, your golf bag. Carrying a heavy bag for 18 holes can cause the spine to be compressed, leading to disc problems and nerve irritation. If you prefer to ride in a cart, alternate riding and walking every other hole. Bouncing in a cart can be hard on the spine.
  • Keep your entire body involved. Every third hole, take a few practice swings backwards and with the opposite hand to balance out the stress put on the back and rest of the body. Imagine going to the gym and working only one side of your body everyday for years, neglecting the opposite side. Golf tends to create this same type of imbalance in your spinal column, setting the stage for injury.
  • Drink lots of water, especially in the heat. Dehydration causes early fatigue. When fatigued, we compensate by adjusting our swing, which increases the risk of injury. Smoking or drinking alcoholic beverages while golfing also causes dehydration.

If you golf consistently, you will no doubt feel the stress of the game. But by following a few simple prevention tips, it is possible to play pain-free. Chiropractic care is an effective solution for golfers who seek to rid themselves of pain and have a successful and enjoyable golf game!

Pathways to Healing specializes in holistic chiropractic care. Dr. Alyssa Musgrove draws on a variety of techniques, including chiropractic, kinesiology, nutrition, food allergy testing and lifestyle counseling to assist clients in achieving optimal health and wellness in one setting. Pathways to Healing is located at 1022 Founders Row, Lake Oconee Village, Greensboro. The office can be reached at 706-454-2040.

Why Is Shoulder Pain So Common?

By: Dr. Alyssa Musgrove – Pathways to Healing

The shoulder is the most complex joint in the human body. Studies show nearly 90 percent of the population will tear or damage their rotator cuff, labrum and/or shoulder capsule at some point in their lives. Most of us are unaware of how important the shoulder is until we injure it. Shoulder pain of any sort can make daily activities like combing your hair, brushing your teeth, sleeping and getting dressed complicated and painful.

The reason for the high prevalence of shoulder injury is due to the anatomy and structure of the shoulder. The human shoulder is made up of a complicated system of bones, joints, connective tissue and muscles. The shoulder’s ball and socket joint allow for excellent mobility, but unfortunately a joint cannot be both highly stable and highly mobile. In the case of the shoulder, mobility comes at the expense of stability.

There are many ways we can injure the shoulder, such as falling, throwing, lifting, painting, cleaning, swinging a tennis racket or golf club. Problems can also occur from natural wear and tear over time. One of the biggest challenges in managing shoulder pain is finding the origin. Shoulder pain can be musculoskeletal in nature, it can be referred pain from a visceral organ, it can result from overuse (as in the cases of bursitis or tendonitis), there can be tears in the connective tissue, bone spurs or muscle imbalance.

What’s more, the shoulder is slow to recover from injury. Some research shows only about half of all new shoulder pain episodes achieve complete recovery within six months. Factor in aging, chronic health conditions that slow healing (like diabetes), and hobbies or jobs that are repetitive in nature and increase the risk of re-injury, and it is easy to see why many don’t make a full recovery from shoulder pain.

Chiropractors, physical therapists, acupuncturists and orthopedists are just a few specialists who can help ease shoulder pain. The use of manipulation, mobilization, magnetic field therapy, TENS unit and modalities like cold lasers can help tremendously, but some shoulder injuries do require surgery. If your shoulder pain has not resolved on its own by resting 1 to 2 weeks, you should check with your doctor. However, that does NOT mean you should wait two weeks before seeing someone about your shoulder. Some people ignore nagging pain for weeks or even months, but the sooner you see a doctor the quicker you can begin treatment and resolve the issue before surgery becomes the only option.

When it comes to keeping our shoulders healthy, an ounce of prevention is truly worth a pound of cure.  Here are a few ways to protect your shoulders on a daily basis:

  1. When working with your arms overhead, take small breaks to let the shoulder recover.
  2. Do not reach in the back seat and lift a heavy purse, bag or briefcase at an awkward angle in order to get it to the front seat.
  3. If you are facing a challenging task, request a helping hand. Do not feel insecure about asking for help.  It is better to be safe than sorry!
  4. Follow an exercise program that maintains strength in your shoulders and contains opposition exercises to keep the shoulder muscles balanced. For example, if you are going to do push-ups, make sure you also do pull-ups. In this way, both sides of the body are strengthened for optimal balance and pain-free function.

The following stretches can be done at home to help further balance the shoulder joint and prevent simple injuries:

90, 90 shoulder stretch
Stand in your doorway, holding your arms up so your elbow is at a 90-degree angle and your arm forms a 90-degree angle to your body at the shoulder. Place each hand on the side of the door frame making sure your wrist and elbow also make contact with the door frame. Place both feet in the doorway and lean forward as you brace yourself against the door frame. Make sure your neck is aligned with your spine. Do not drop your chin — keep it parallel to the floor. Hold the stretch for 20-30 seconds and repeat 2-3 times.

Pendulum exercise
Bend at your waist with one hand hanging down and your other arm supporting your upper body on a table or chair. Relax your hanging arm completely and swing it gently and slowly in a figure 8 direction in both clockwise and counterclockwise. You can grasp a light weight, such as a soup can, while smoothly swinging the arm. Circle 10-15 times each direction, do 1-2 sets per day.

Finger wall walks
Face a wall. Using one arm at a time, slowly walk your fingers up the wall, moving your arm upward as far as you can reach comfortably. Then walk your fingers gradually back down the wall (STOP if there is any point of pain). Repeat 10-20 times.

Cross-body reach
Lift one arm at the elbow and bring it up and across your body and hold a stretch for 20-30 seconds. Each day try working on reaching further across your body in order to increase mobility.

Towel stretch
Take a small towel that is about 3 feet long and hold each side with your hand. Bring the towel behind your back and grab the opposite end with the other hand. Pull the top arm upward while also pulling the other lower arm downward to stretch your shoulders. You can also hold the towel on both ends while pulling with both arms to keep the towel tight and raise your arms in front of you and above your head, keeping elbows straight at all times.

Pathways to Healing specializes in holistic chiropractic care. Dr. Alyssa Musgrove draws on a variety of techniques, including chiropractic, kinesiology, nutrition, food allergy testing and lifestyle counseling to assist clients in achieving optimal health and wellness in one setting. Pathways to Healing is located at 1022 Founders Row, Lake Oconee Village, Greensboro. The office can be reached at 706-454-2040.

Do You Have a Tech Headache?

By: Dr. Alyssa Musgrove

Technology offers many conveniences in terms of staying connected and entertained via small devices that fit in our pockets. But, unfortunately, as smartphones and gadgets get smarter, our posture gets weaker.

When we stand in proper alignment, the cervical spine (neck) and surrounding structures are able to support the weight of the head, which on average weighs about 10 pounds. When we look down at a phone, computer or electronic device (something we do on average between 2 to 4 hours a day), the neck is flexed forward and the weight of the head increases dramatically. In fact, a researcher by the last name of Hansraj evaluated the amount of pressure placed on the neck and shoulders when the head is at varying degrees. He concluded when the head is tilted just 15 degrees forward, it nearly triples the head weight to about 27 pounds felt on the neck and shoulders. At 45 degrees of tilt, head weight increases to about 50 pounds on the neck and shoulders.

“Text neck” and “tech headaches” refers to conditions caused by chronically holding your head flexed and forward, as we do when looking at our handheld devices. This new societal posture norm generates a tremendous amount of unnecessary stress to the posture system and, over time, is the culprit of many symptoms people experience on a daily basis.

Chronically maintaining a forward head posture can lead to muscle strain, headaches, neck pain, shoulder pain and TMJ (jaw) pain. Forward head posture can also cause disc injury, pinched nerves, early arthritic changes of the neck, numbness and tingling in the arms, hands and fingers. As the head moves forward and your upper back and shoulders become rounded and hunched, lung capacity decreases, resulting in shallow improper breathing that restricts the amount of oxygen reaching your tissues.

Here are several simple steps you can take today to avoid developing degenerative neck changes, muscle strains and pain from “text neck” and “tech headaches”:

Limit the time

Limit the amount of time you use your device. If you must sit for an extended period of time, take breaks to change your posture, move around and stretch. Develop a habit of taking a two to three-minute break for every 15 to 20 minutes you use your device or sit at a desk. Utilize your smart device to set automatic reminders and that will notify you when to take a break, stretch and reposition.

Raise the device

Elevate your device as close to eye-level as possible. (You can find holders for devices that make this possible.) Also, be aware of the placement of your computer screen. You should be able to look forward without looking down to view the screen. Simply lifting the computer screen to eye level will help maintain proper posture throughout the day.

Stretch

Chin tucks are a great exercise to stretch the neck. Move your chin backward towards your chest without moving it up or down and hold for five seconds as you feel a comfortable stretch at the base of your skull. You can also tilt the head to one side, bringing the ear close to the shoulder. You may use your hand to pull your head further into the stretch (best done while exhaling your breath), holding the stretch up to 20 seconds. You can also do the same thing while rotating your head from side to side to reach different muscles, repeating 3-5 times on each side.

A doorway can be helpful for stretching chest muscles. Place your palms flat against either side of the doorframe, with your shoulders and elbows at a 90-degree angle to your forearms. Lean forward until you feel a stretch in your pectoral muscles and hold for 30 seconds at a time.

Rest the head

If you sit at a desk for long periods of time, switch to a chair with a headrest and focus on keeping the back of your head in contact with the headrest, trying to keep your chin parallel to the ground and avoid looking down. You can also practice this while driving — focus on pressing the back of your head on the headrest in the car and bringing the shoulders back.

Be aware of pain

Use pain as a warning sign to check yourself. Experiencing pain in your neck, burning between the shoulder blades, numbness or tingling in the arms or frequent headaches is your body’s way of telling you to act quickly and make a change. Pay attention to these warning signs and take action before a more serious permanent issue arises.

If your symptoms do not improve after incorporating new posture methods, stretching and reducing the time spent on handheld devices, then it may be time to seek help from a qualified professional. Chiropractic adjustments can help relieve joint pain, reduce tight muscles and promote posture habit re-education. The sooner you seek treatment, the more likely it is that you will have success in treating the problem and keep it from progressing to permanent damage.

Pathways to Healing specializes in holistic chiropractic care. Dr. Alyssa Musgrove draws on a variety of techniques, including chiropractic, kinesiology, nutrition, food allergy testing and lifestyle counseling to assist clients in achieving optimal health and wellness in one setting. Pathways to Healing is located at 1022 Founders Row, Lake Oconee Village, Greensboro. The office can be reached at 706-454-2040.